Home Registration Article
How to Create and Register an IntecClouds Account Easily
Posted on 2025-01-31 Updated on 2025-01-31How to Create and Register an IntecClouds Account
Creating an account on IntecClouds is simple and secure. Follow this step-by-step guide to get started. Let’s make the registration process seamless for you!
Step 1: Begin Registration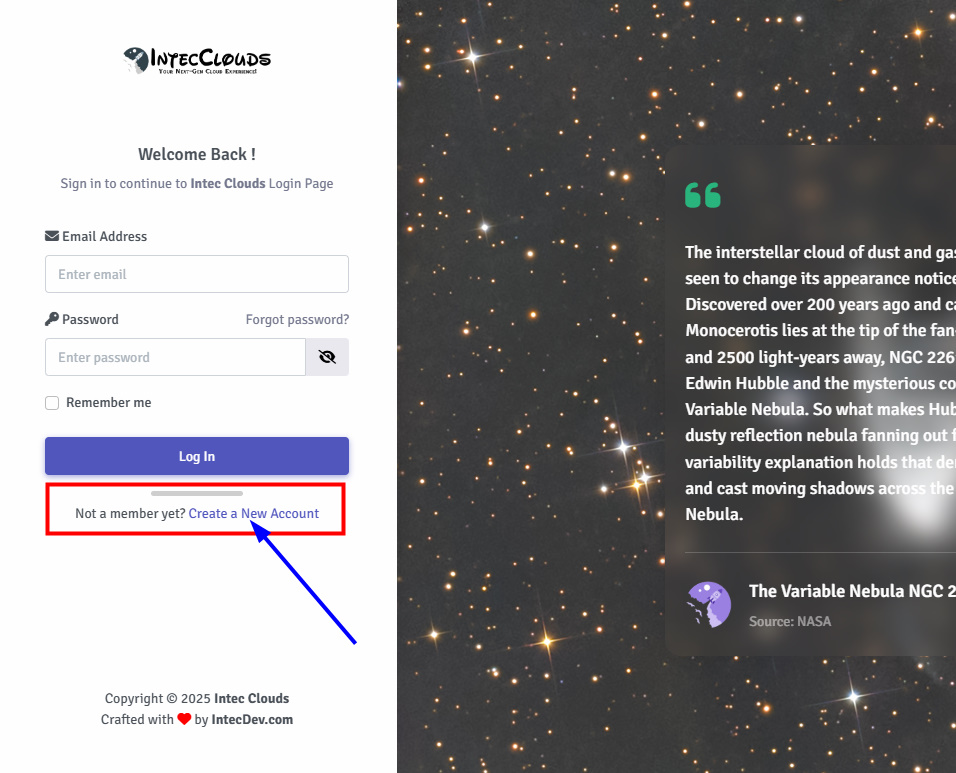
To start, click on the "Not a member yet? Create a New Account" option on the registration page.
Step 2: Enter Personal Information
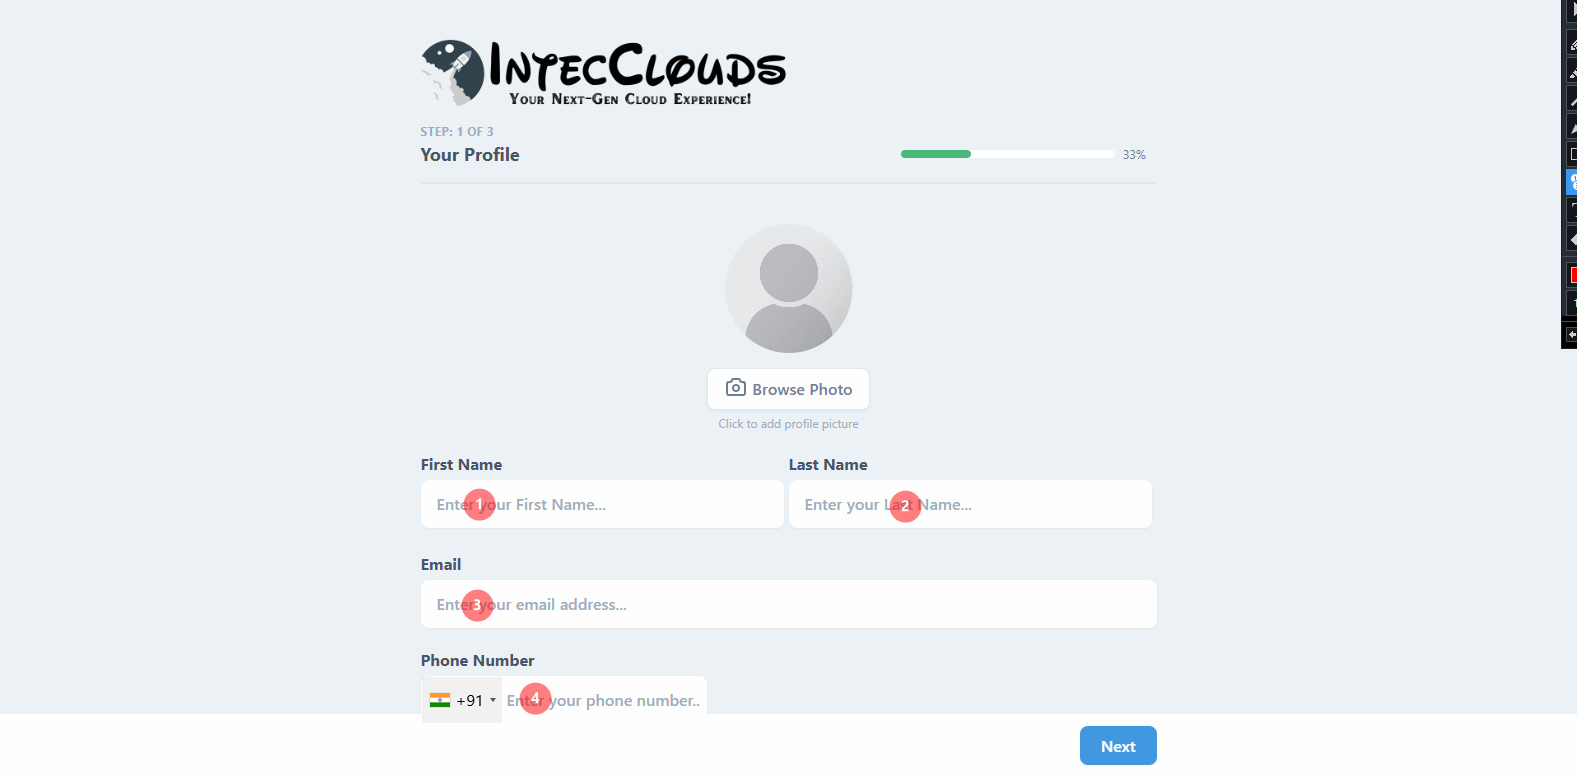
You can optionally upload a profile photo or skip this step. Then, provide the following details:
- Enter your First Name.
- Enter your Last Name.
- Enter your Email Address.
- Enter your Phone Number (mandatory for communication and issue resolution).
Note: Your phone number is stored on highly secured servers and will not be shared with third parties.
Once completed, click Next to proceed.
Step 3: Set a Secure Password

Enter your Highly Secured Password to ensure your account’s safety.
Step 4: Provide Additional Details
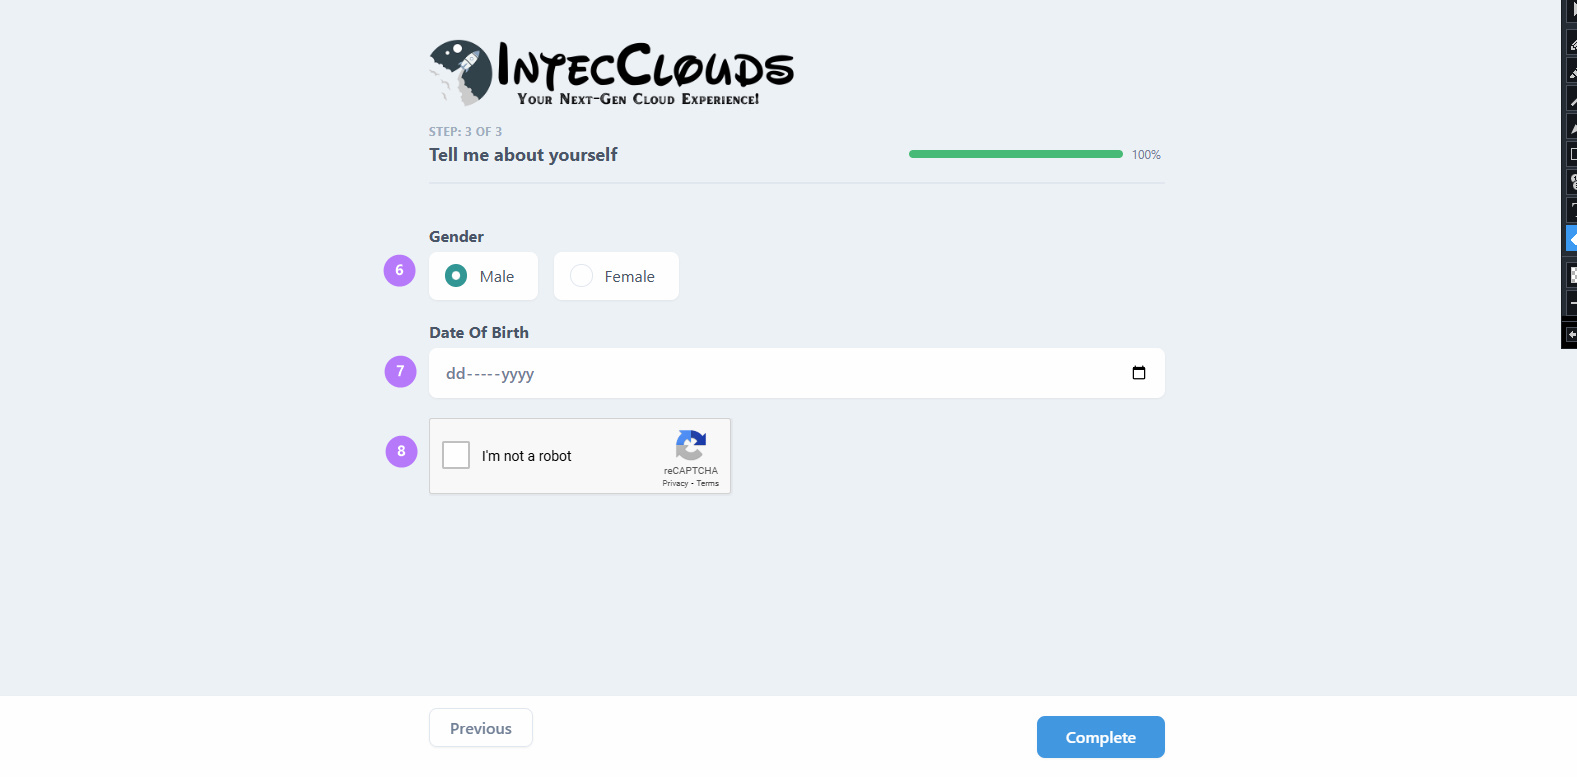
Next, fill in the following information:
- Select your Gender.
- Enter your Date of Birth (We’ll send you birthday wishes and special offers!).
- Complete the Captcha for verification.
Click Complete to finish this step.
Step 5: Account Registration Successful
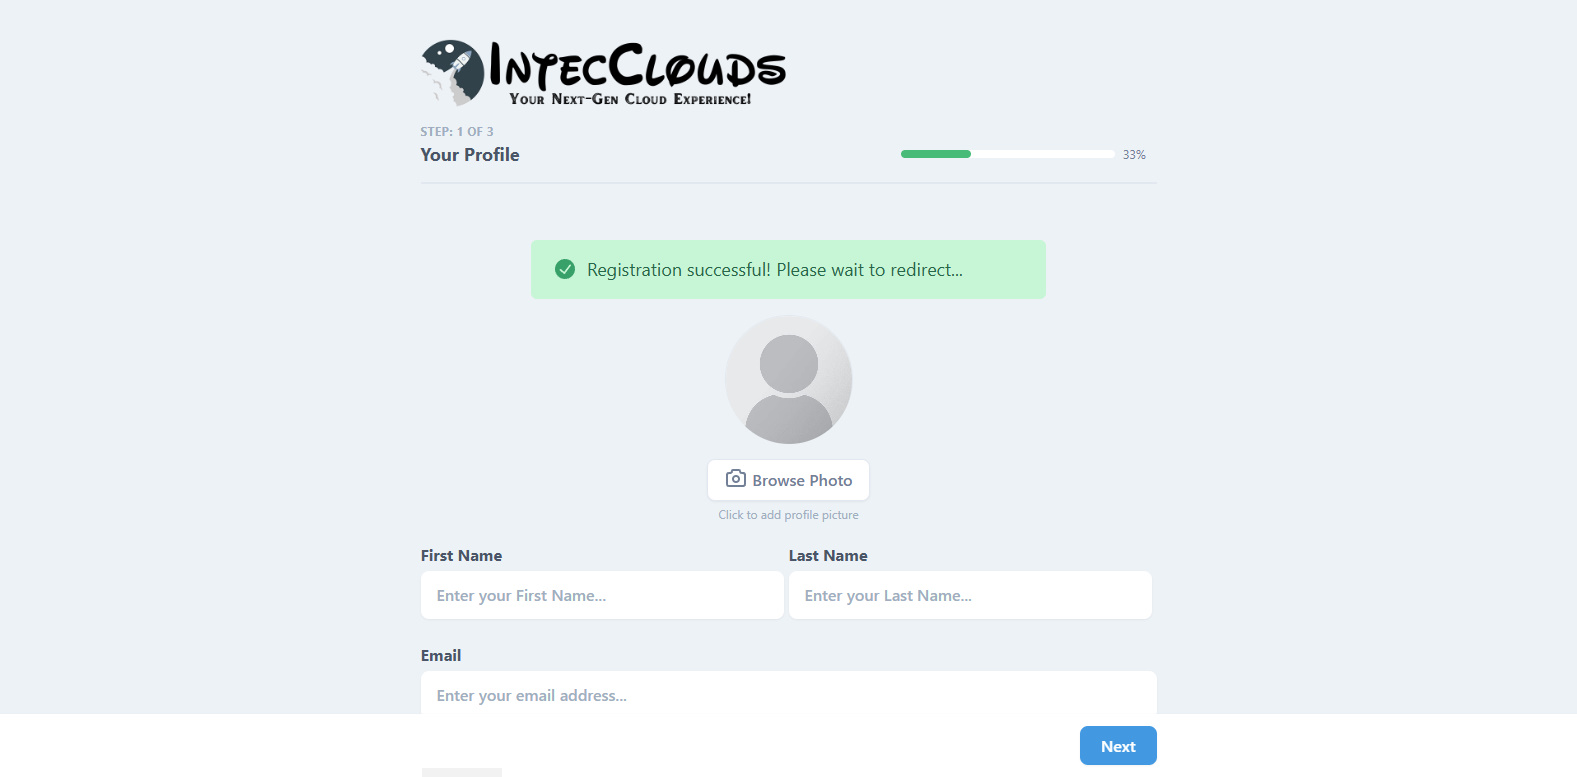
Congratulations! Your account has been successfully registered.
Step 6: OTP Verification
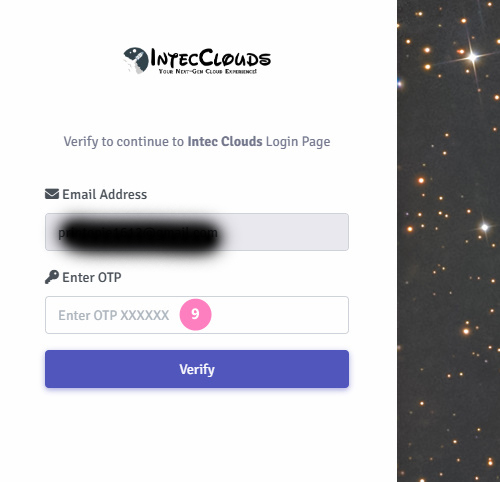
You will receive a One-Time Password (OTP) on your registered email. Enter the OTP to verify your account.
Step 7: Verify Your Email
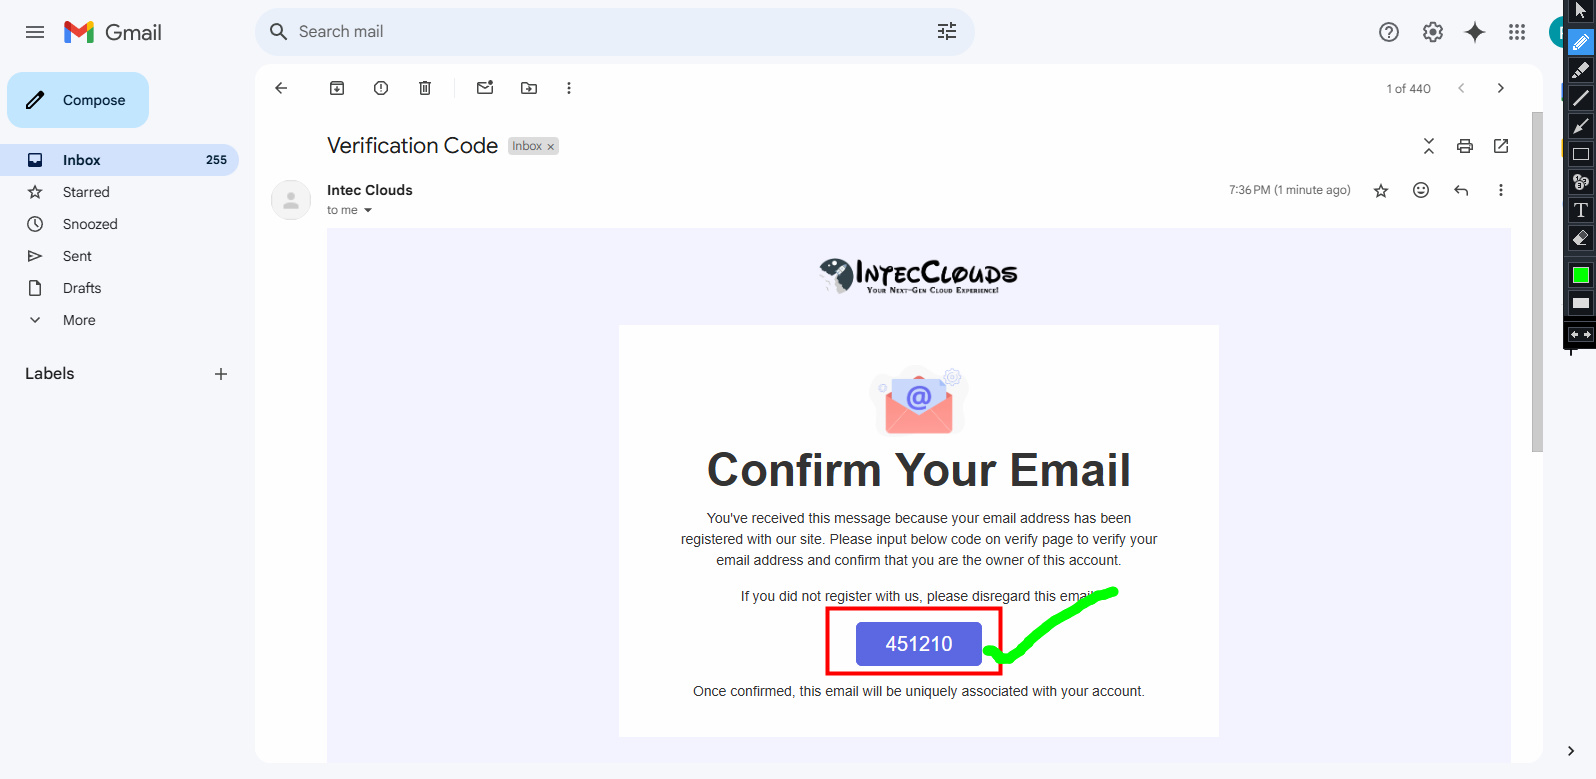
As shown in the image, locate the OTP sent to your email. Fill it in and click Verify to proceed.
Step 8: Log In to Your Account
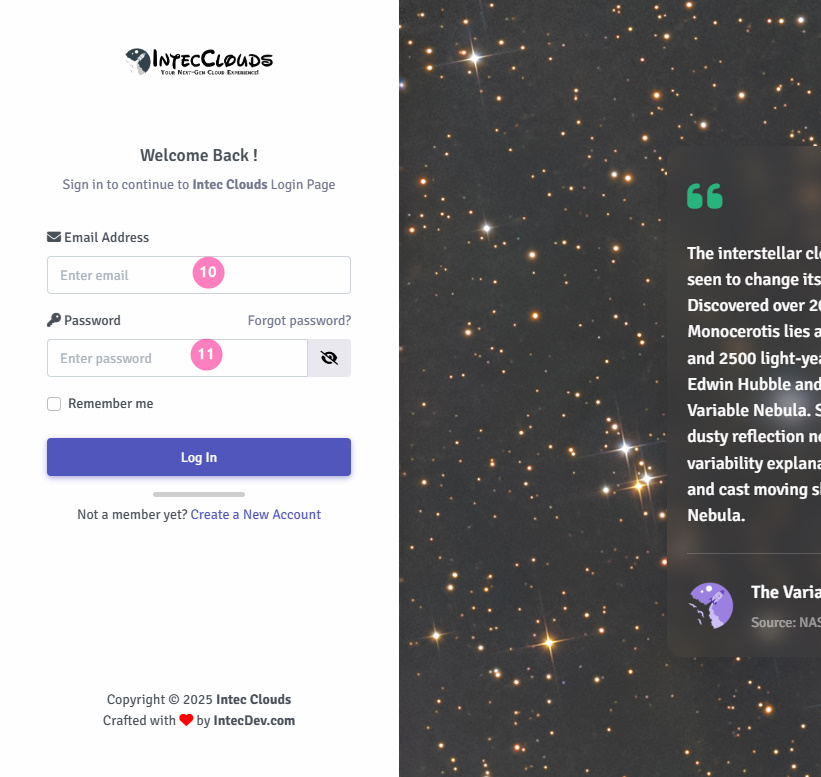
Now it’s time to log in:
- Enter your Registered Email ID.
- Enter your Registered Email Password.
Click the Login button to access your account.
Step 9: Onboarding Page
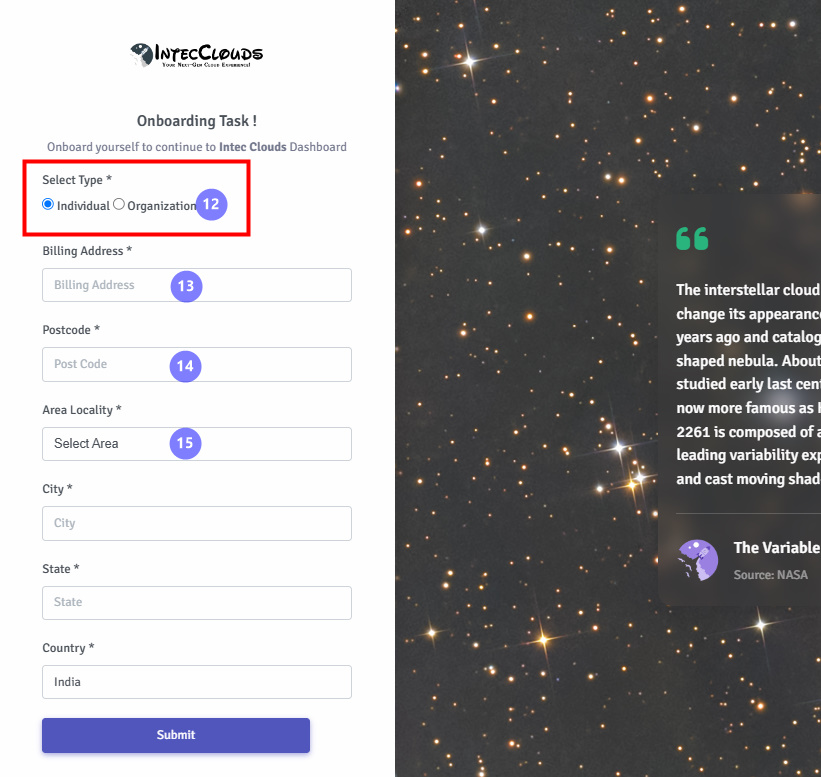
After logging in, you will see the One-Time Onboarding Page:
If you’re registering as an individual, leave it as Individual (default). For businesses or B2B needs, select Organization and proceed to fill out the business details as shown.
Step 10: Fill Business Details (For Organizations)
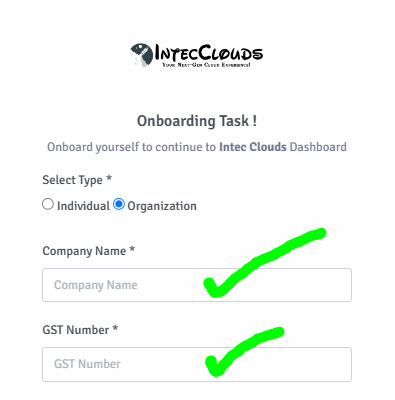
Provide the following:
- Enter your Business Name. (If you are Organization Leave for Individual)
- Enter your GST Number. (If you are Organization Leave for Individual)
- Fill in your Address.
- Enter your Pin Code/Zip Code. The system will automatically fetch your City and State based on the pin code.
- Select your Area/Region and click Submit to complete the process.
Step 11: Registration Complete!
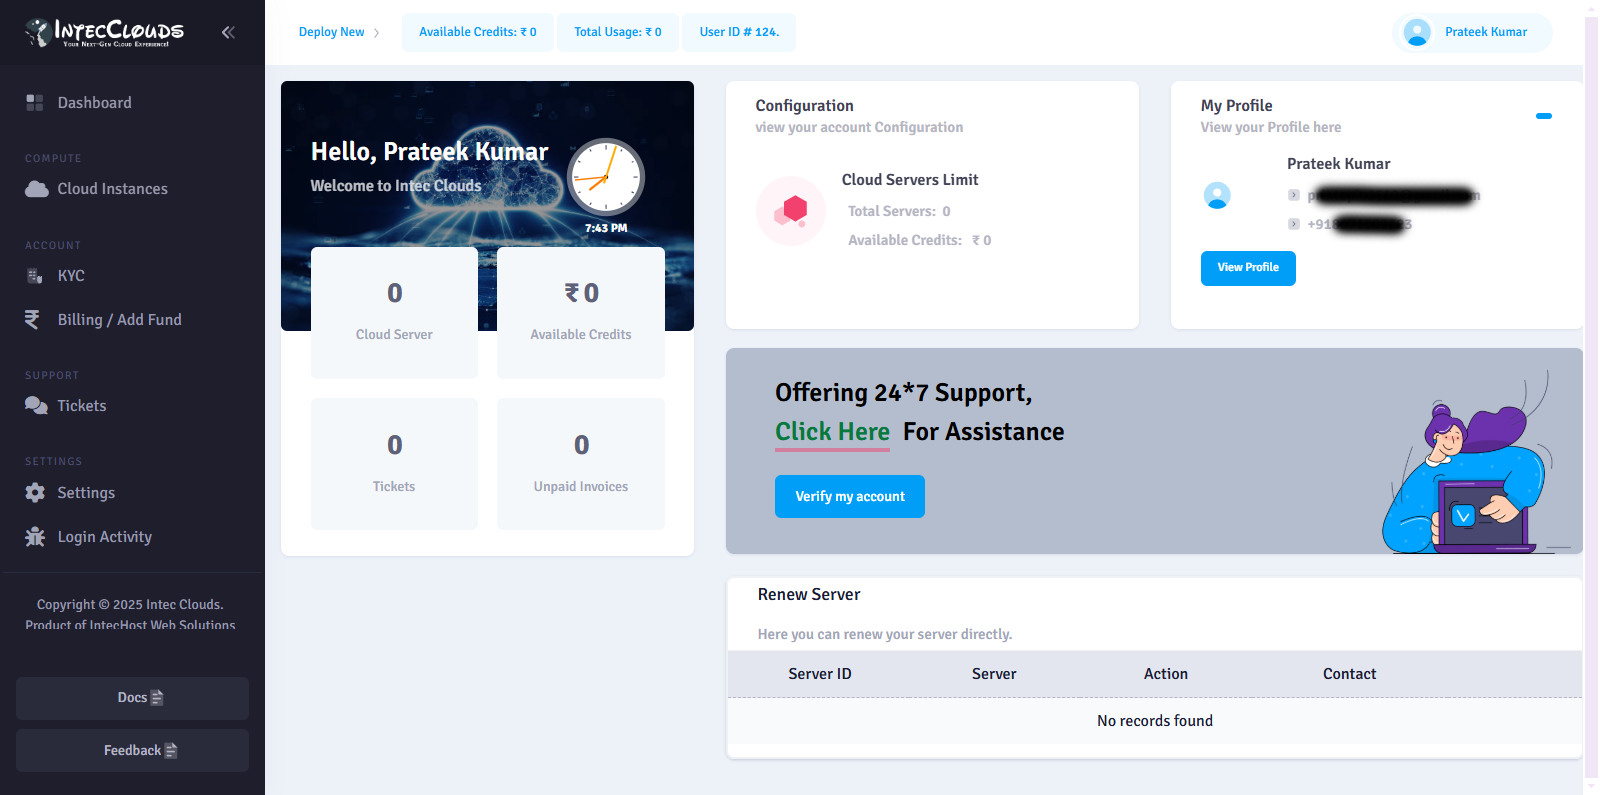
Hurray! You are now successfully registered and logged in to your dashboard. Enjoy seamless access to IntecClouds services!
Found this article helpful?
[ 1 Out of 1 Found Helpful ]
